Silhouette Studio Thank You Card

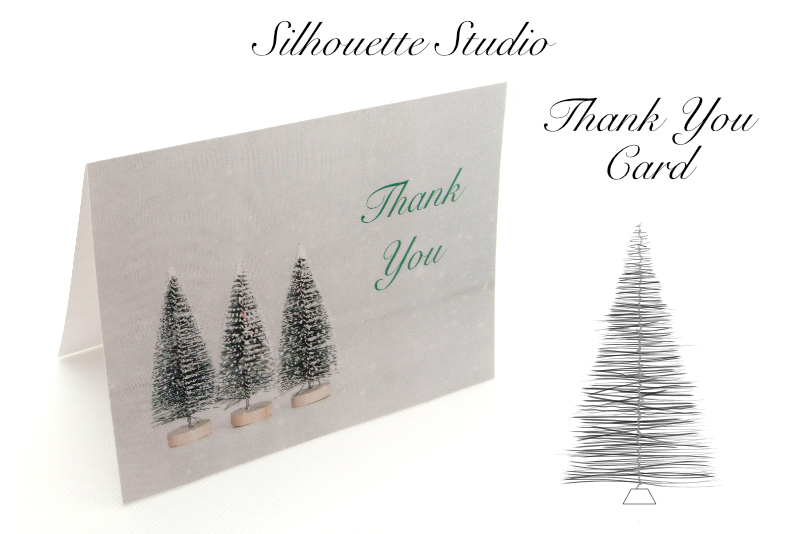
In this Silhouette Studio® tutorial, we will make a thank you card that is perfect for the holidays or a winter theme. We will start with a photo of a nice snow scene, add the Thank You text and print and cut our thank you card.
The card will be 6 by 4.5 inches at 300 dpi, so our first step is to resize the photo to match these dimensions. You can find a link below to download the free photo from Unsplash.com. Open the photo in to you photo editing software, and reduce the photo to 6 inches wide and 4.5 inches tall. Export the photo as a jpeg image for use in Silhouette Studio.
The Silhouette Cameo 5 was supplied to me by Silhouette America.
Silhouette, Silhouette Studio, Silhouette Connect, PixScan, Silhouette CAMEO and Silhouette Portrait are either registered trademarks or trademarks of Silhouette America, Inc. Product screen shot(s) reprinted with permission from Silhouette America®, Inc.
The card will be 6 by 4.5 inches at 300 dpi, so our first step is to resize the photo to match these dimensions. You can find a link below to download the free photo from Unsplash.com. Open the photo in to you photo editing software, and reduce the photo to 6 inches wide and 4.5 inches tall. Export the photo as a jpeg image for use in Silhouette Studio.
- Start a new card project with the New Project Wizard. Click File - New Project Wizard. Select the Card project from the list and click Start.
- In the Page Setup panel, set the Media Size to Letter and the Orientation to Portrait.
- Click the Registration Marks icon, to open the window. Set the Registration Marks to On.
- With the card cut line selected, click the Scale icon in the Transform panel. In the window, set the Width to 9 inches and the Height to 6 inches. Click Apply (see screenshot).
- Also in the Transform panel, click the Rotate icon to open that window. Click the Rotate by 90 Degrees Clockwise icon (see screenshot).
- Place the card cut line within the Registration Marks on the cutting mat (see screenshot).
- Click File - Merge to import the image into the project. Drag the photo to the bottom section of the card cut line (see screenshot).
- Select the Text tool and type Thank You in the open area of the card.
- In the Quick Assess toolbar, set the Fill color to green, the Stroke color to Null, the Font to Snell Roundhand, Text Size to 48 and Alignment to Center.
- Drag the text in to the open area of the photo.
- With the Registration Marks still on, click File - Print to send the card to the printer.
- Add the printed card to the cutting mat.
- Click the Send tab at the top right of the workspace. Select the Cut Edge option in the window (see screenshot).
- Click the Line tab in the Send panel. The Red color should be checked and set to Auto(cut). The other should be unchecked (see screenshot).
- Click the Send button at the bottom of the panel to send the project to the cutting machine.
We need to set up the cutting area to Letter size for the Print and Cut feature (see screenshot).
We need to resize and rotate the card cut line for the thank you card.
Now we are ready to add the photo to the card.
Let's add the thank you text.
Now we are ready to print and cut the card.
This tells the cutting machine to only cut the red outline around the card and to not cut out the text.
The Silhouette Cameo 5 was supplied to me by Silhouette America.
Silhouette, Silhouette Studio, Silhouette Connect, PixScan, Silhouette CAMEO and Silhouette Portrait are either registered trademarks or trademarks of Silhouette America, Inc. Product screen shot(s) reprinted with permission from Silhouette America®, Inc.

Related Articles
Editor's Picks Articles
Top Ten Articles
Previous Features
Site Map
Content copyright © 2023 by Diane Cipollo. All rights reserved.
This content was written by Diane Cipollo. If you wish to use this content in any manner, you need written permission. Contact Diane Cipollo for details.


